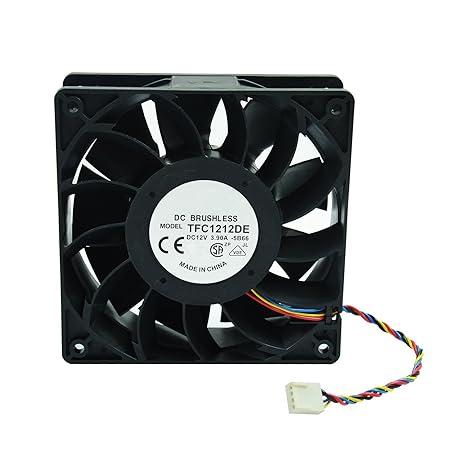
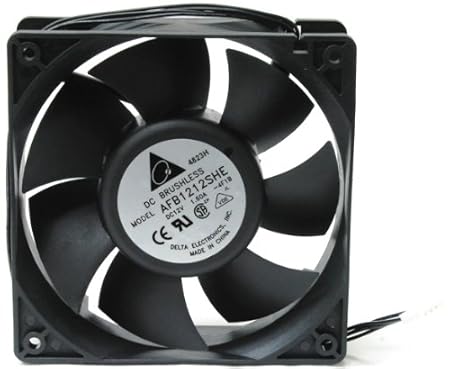
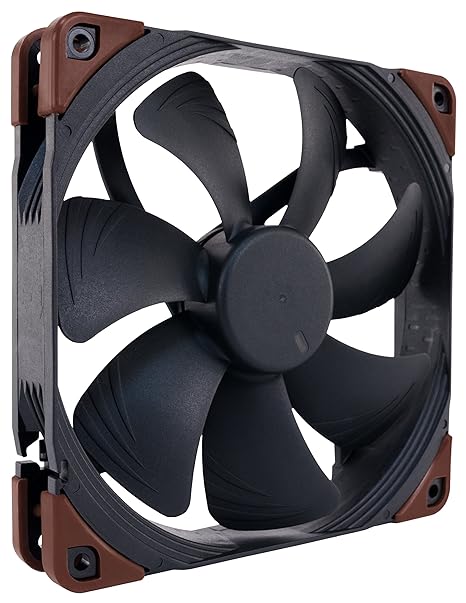
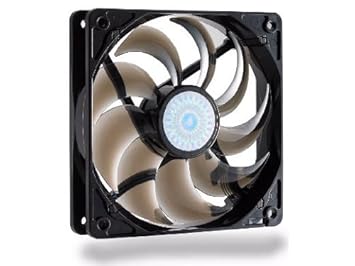
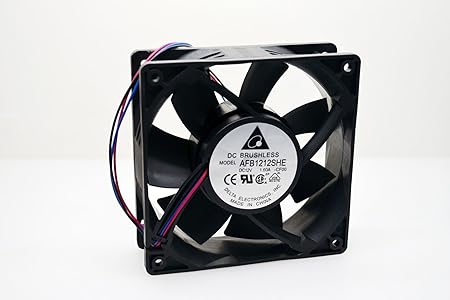
Ultra Strong 12cm DC12V Cooling fan. 200CFM
Why we love it?
Brushless Motor Durable
Some comments about this we saw on the web:
* /u/checkitoutmyfriend on /r/BurningMan I used two, one for each pad, inner and outer. This way if one pump dies I still have the other pad getting water. No dry spots) Same with the fans. I one dies just tape it off. But I do carry extra pumps & fans. I also found if you flip the header tube so the holes are pointing up or slightly outward (10:00 position), then sew up a loose fitting sleeve from a tee shirt to go around the tubing, The water pressure balloons up the sleeve allowing for better water dispersion over the pads.The Media is called CoolPad Bonded paper pad. HVAC shops carry it, or can get it. Lowes and HD carry it in season, in rolls if you are making a few bins for buddies. Do all the media cutting at home as its a tad moopy. Not like Aspen pads but still moopy. Once assembled in the chicken wire cage, its good to go.
This also has a couple of float switches and a programmable timer. Being this bin is for grey water removal, I set up some simple controls to start when full, shut down pumps at low level and run the fans for a set time after that to completely dry the pads. When it fills back up it starts all over.
Links:
——* /u/checkitoutmyfriend on /r/BurningMan I have this fan, two actually….
——* /u/wolfraidernyc on /r/BurningMan This is what I originally used for my figjam based on a recommendation from eplaya. Unfortunately, it’s only 200 cfm so depending on your tent size it may not move enough air. https://www.amazon.com/gp/product/B0054S92FW/ref=oh_aui_search_detailpage?ie=UTF8&psc=1
How big is your tent in cubic volume (width x depth x height)?
——* /u/BedditTedditReddit on /r/BurningMan This one for me: https://www.amazon.com/dp/B0054S92FW/_encoding=UTF8?coliid=I1L2M8K6J1HN35&colid=2IDBC7ZE307IX
——* /u/bad_tenet on /r/BurningMan Sure! For starters I spent months researching eplaya and elsewhere on the web. There are some companies that sell turn-key systems, like Goal Zero, that seem crazy over-priced. I told myself I would’t charge anything to my CC and I’m pretty good at figuring shit out, so I wanted to take a cheaper route. I wanted avoid soldering a bunch of Chinese stuff together if I could. Once I figured out what I needed, I had to look for components…
Panel - I looked at everything from 5 watt panels for fountain pumps to big ass 100 watt panels. I am flying from the East Coast so I needed something portable. I was thinking I need 20 watts to be comfortable, so I looked for 30+ watt folding panels. A cherry-on-top feature would be both AC and DC power. I committed to a DC cooler system but it would be nice to charge phones and power banks too. If I am going to spend some cash, I don’t want a single purpose device. I came across SunKingdom early on but the panels were mad expensive. Almost like Goal Zero expensive. Then one day out of the blue this guy popped up on sale! https://www.amazon.com/gp/product/B00MTAFEJ6/ref=s9_hps_bw_g107_i4
I got it for $79! Very happy with it so far. I’ve used it several times already.
*Charge Controller *- This was pretty simple. I found one that could handle the load, was easy to use AND had two USB outs for good measure. https://www.amazon.com/gp/product/B018ICLC3K/ref=oh_aui_detailpage_o04_s00?ie=UTF8&psc=1
I must confess I don’t know how to “use” it. I plugged it in and it does what I need it to do for now. It has some really shitty instructions (none) so I hope I don’t need to figure out how to do something else with it.
Battery - I am going to buy a 100+ ah battery in Reno but I needed something to test with. I found this 12 v 12 ah battery on sale at Radio Shack for like $12. She told me it was for a discontinued Verizon cable box.
Bucket - I have a few Home Depot buckets around the house as a matter of course. I cut two rows the first time and decided I’d rather have one row of squared off holes instead of two rows of round holes. This way I get a lot of airflow and maximize the water holding capabilities of the bucket. I can probably fit another .75 gallons in my bucket with one row of holes.
Padding in the bucket - Went with FIGJAM’s suggestion for $22. It comes with two in case you fuck one up. Cut to FIGJAM’s spec and adjust as needed but give yourself an extra inch in all measures and fine tune from there. https://www.amazon.com/gp/product/B001UTNFPW/ref=oh_aui_detailpage_o07_s00?ie=UTF8&psc=1
Pump - I was told 60 gallons per hour (GPH) was good enough so I bought this for $10: https://www.amazon.com/gp/product/B00JWJIC0K/ref=oh_aui_detailpage_o09_s00?ie=UTF8&psc=1
At first I didn’t think it was powerful enough but I had a dead ass battery. After I charged it up, this little guy acted like a freshman going to prom with the homecoming queen. It squirts quite well. I bought 2 more as back up.
Tubes - I bought some tubbing at Home Depot and experimented. It’s took a few rounds of $5 tubes to figure out the spacing of the holes. I heated up a nail on my stove to poke holes in the tubes. Ended up with nice, clean holes.
Fan - VERY IMPORTANT PART - IF YOU CAN’T MOVE AIR, NOTHING ELSE MATTERS My smaller 4 person tent does’t need much so I thought a 150 cubic foot per minute (CFM) fan would be fine. I wasn’t crazy about the horsepower of my first fan that was $8: https://www.amazon.com/gp/product/B0099TTAIG/ref=oh_aui_detailpage_o03_s00?ie=UTF8&psc=1
So I ordered a 200 CFM fan for $18: https://www.amazon.com/gp/product/B0054S92FW/ref=oh_aui_detailpage_o05_s00?ie=UTF8&psc=1
Again, I charged the battery and got MUCH better performance from the 150. However the 200 makes me feel like I ate a York Peppermint Patty so I am using it and taking the 150 as back up.
Connectors - All “raw” cables get connected via these $5.55 things that are very easy to hook up. https://www.amazon.com/gp/product/B015OCV5XO/ref=oh_aui_detailpage_o01_s00?ie=UTF8&psc=1
My pump and fan need to go to one line so I got this for $4.38: https://www.amazon.com/gp/product/B007Q8IKRE/ref=oh_aui_detailpage_o01_s00?ie=UTF8&psc=1
The “watch this” moment comes by the way of this $6 switch: https://www.amazon.com/gp/product/B00G6GNREI/ref=oh_aui_detailpage_o01_s00?ie=UTF8&psc=1
I think that is everything. Now I need to figure out how to get a big ass battery from Reno to the Playa on Saturday, pre-gate. I can probably use my camps local asset or ask someone driving in.
——* /u/checkitoutmyfriend on /r/BurningMan Pump
Pump upgrade This one really moves some water! You will need to increase your tubing/tee size from 3⁄8” to 1⁄2”.
Jungle Special, good to have a spare.
Media Confirm size!! These come cut in various sizes. One of them goes all the way around the inside of the bucket. I like this media better as it allows better air flow. But you need to make a cage out of chicken wire to hold it up when its wet. Like a tubular filter cartridge. It can be found in pre-cut panels like the poly pads too.
Fan Get a spare, along with the pump. Pre-wired for quick change out if needed. If you don’t have spares, you will need them. If you do, you never use them. :)
Flex Duct This can be ‘shaped’ to fit around the fan mounted on top of the lid. Its 5” duct. Kind of an ‘off size’ but works great for this. Some duct tape and you’re all sealed up. Gently bend to the desired direction, wrap with a towel or bubble wrap for some insulation if you like. It comes compressed length wise at 29”. It can be expanded to 8ft! Handle with care while shaping ‘a square’ to fit around the fan. And again when setting the direction you want it pointing. Cut to length if needed.
- A five gallon paint bucket with lid
- 3⁄8” ID Tubing.
- A 3⁄8” Barb Tee.
- Some wire & crimp terminals 3ft should do it.
- Switches for the pump and fan if desired.
- Deep cycle battery.
- Solar panel and charging controller.
- Or other 12VDC power source.
I made a bin style cooler for last year. (It is FigJam inspected and approved! :) )But I used it for grey water evaporation. Used two of the big pumps and two fans. It held 6gals & would evap 2gals/hr in the heat of the day! 1-1.5gal/hr the rest of the time. Building a trash bin style for this year. It will have a 24”tall x15” dia ‘cylindrical cage’ for the media and an 8” radiator fan. Basically an upsized FigJam cooler but for grey water evap. The Bin is for sale.
——* /u/checkitoutmyfriend on /r/BurningMan UPDATED FIGJAM BUCKET COOLER PARTS LIST:
Note: do search around on Amazon as prices vary a lot for the same item. Watch out for China 28 day shipping if the price is really low.
Pump - get two, one for back up
Fan - mount it on top of the lid. Skip the PVC fitting he lists and get a semi rigid drier duct. Shape one end square, work it onto the fan, secure with tie wrap(s). Wrap with a towel or foil bubble wrap for some more insulation.
Tubing is 5⁄16” ID - can be had at most HD, Lowes, Menards, etc. 5⁄16” tee
Media is the same - (This is an example) HD, Lowes, etc carries it much cheaper.
——* /u/checkitoutmyfriend on /r/BurningMan A couple of things to know about evaporative cooling. Ice or cold water does not improve cooling, it actually hinders it. In fact it works better if the water is hot. Google it for more of an explanation why this is true but basically evaporative cooling is ‘boiling’ water to a gas. So don’t throw ice in there. Use it for drinks…. ;)
The next is air flow and wetting of the pads. Air flow should be even and the pads fully wet. No dry spots. Now when you first fire it up it will take a minute or two to get the pads fully soaked. This is where you see him adding more holes in the ‘header’ tubing to get more water where the pads are dry. Dry spots also have less restriction than wet so the air will flow through these spots more than the wet, defeating what we are trying to do. I do like his ‘hot wire poker’ for making the holes. Much better than a knife or drill.
Finally, The space you are cooling needs someplace for the air inside to go. Think of your tent like a balloon. Obviously, it is not completely air tight like a balloon, but close. If you have all the vents sealed up like you do to keep dust at bay on the playa, with a large enough fan you could blow it up like a balloon all fat a puffy. The problem is once the fan packs the air into the tent with nowhere to go, the air flow slows down through the cooler, reducing the efficiency of your cooler. So you will need to play with opening a vent, preferably up high, (hot air rises). Having a positive pressure inside the tent is a good thing as it will also help to keep the dust out. But not so much that it reduces the air flow through the cooler. Experiment to find the happy medium. Now if you tent leaks like a sieve, you may not to open any vents. ;)
I am making a slightly larger unit than the HD bucket cooler but not as large as FIGJAM’s Trash Can evap. Notice his tent is ‘slightly’ puffy. Side panels bow out, not hang in like normal. Now if you go the trash can route, do be aware how much air an automotive radiator fan moves. Many newer vehicles have electric radiator fans. Open the hood when its running and note the air flow. There are ways to slow them down but we can talk about that later if needed.
I am using a storage bin similar to this one It has ‘keeper lathes’ on each end to keep the lid in place. And the lid itself is flat for mounting 2 fans and 2 PVC/ABS fittings on top.
Let me also note that I will have unlimited 12VDC power (two deep cycle marine batteries) and will not be using solar panels. But the wiring is the same. You will need to calculate the power requirements of the fan(s) and pump to buy the correct panel if you’re going to go this way.
Here is what I have arriving tomorrow.
My unit is actually for grey water evaporation, but the theory is the same. This float switch is to shut things down when the water level is too low for the pump. I most likely won’t be there when this happens and don’t want to hang around waiting for it finish. For cooling just keep an eye on the water level and ad as required.
The media(pads) you can get at HD, Lowes, or any air conditioning supply house. I do like the expanded paper media opposed to the poly fiber. Either will do the job.
The ABS/PVC fittings, tubing & barb fittings from the same vendors.
I am going to use larger PVC(white)/ABS(black) fittings then FIGJAM. The fan is 12cm which is approximately 4-3⁄4”. PVC pipe is not quite 4”, ABS just over 4”. I may go 5” PVC, ABS does not come in 5” so I would need to go to 6”. The reason for this change is these fans are not design for much positive pressure. So the smaller 4” fittings/pipe does restrict the air flow some. The larger fittings allow the fan to have less pressure, thus more air flow. Will the average burner notice the difference? Probably not but I tend to over engineer things so bigger I will go.
When you price these fittings, do be sitting down. They are not $5 fittings.
Just realized the wall of text I have so I will stop here for now. I am building mine this next weekend and will take pics and post back if you like. For now what questions would you have after this and the other links provided?
More Beautiful and Useful Items:
Electronics (83)Computers & Accessories (24)
Computer Components (11)
Internal Components (11)
Fans & Cooling (9)
CPU Cooling Fans (2)
